As I mentioned earlier this week, the Jewish New Year holiday, Rosh Hashanah, is right around the corner. The holiday, which lasts two days, begins at sundown on September 24. Rosh Hashanah is a festive occasion, as most New Year celebrations tend to be. Many Jews will mark the occasion with a holiday dinner for friends and family.
I explained in my last post that many Rosh Hashanah foods are sweet to symbolize our hope for a sweet year. Rosh Hashanah dinner often begins with everyone dipping slices of apple into honey to usher in a year full of sweetness.
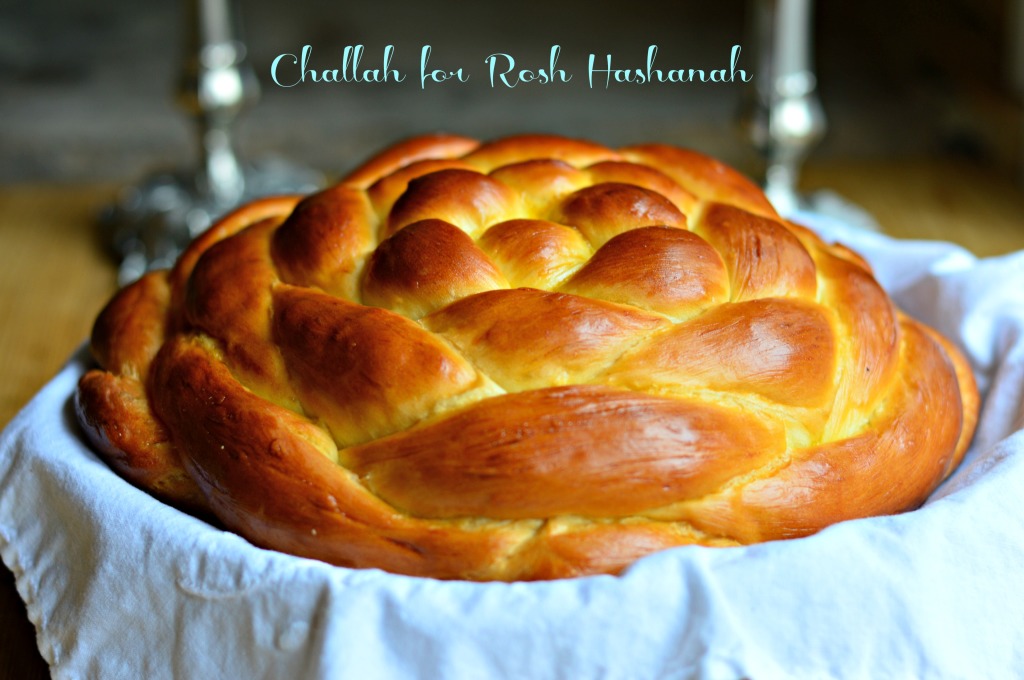
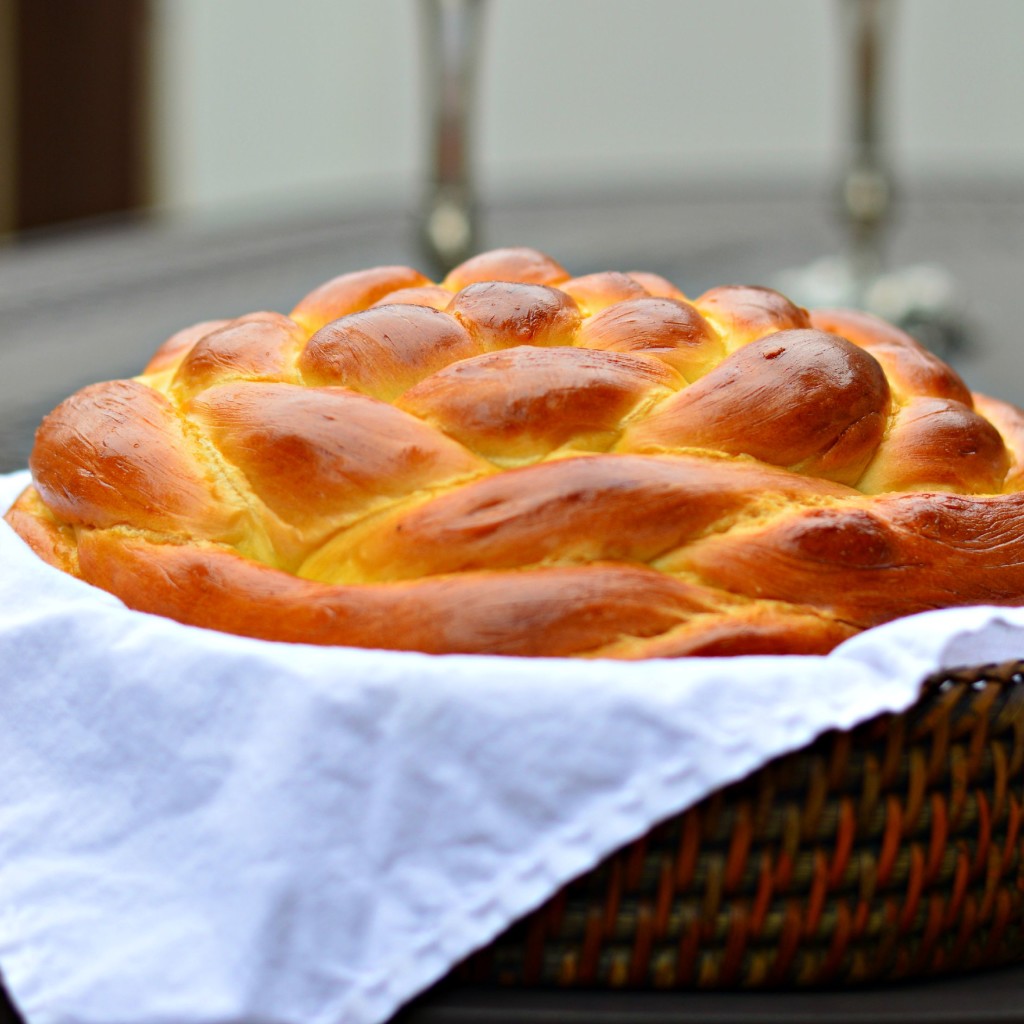
Another important Rosh Hashanah food tradition is to serve food that is round. For my carrot tzimmes recipe, I always cut the carrots into rounds to resemble gold coins. This is to symbolize the wish for a prosperous new year. The traditional Jewish Sabbath bread, challah, is typically oblong and braided but on Rosh Hashanah, everyone serves a round challah to symbolize eternal life.
Once an ethnic Eastern European food, challah has become as mainstream as bagels. While it is now possible to find challah in every grocery store, sadly, most of that challah is dry and tasteless. Good challah should be rich, sweet and eggy, almost like brioche but not as cakey. Good challah makes your morning toast crave-worthy and your lunch sandwich like a favorite deli creation. As for French toast and bread pudding made with challah? I can’t even.
I started making my own challah after almost fainting in one local bakery when they dared to charge $8 for one measly loaf of round challah on Rosh Hashanah. Fortunately, challah is a pretty easy at-home baking project. Years ago, my friend Genevieve taught me her method for making challah in a bread machine and I relied on that while I was working on overcoming my fear of yeast. These days, I feel confident in my ability to tame yeast and have started making challah with my own two hands.
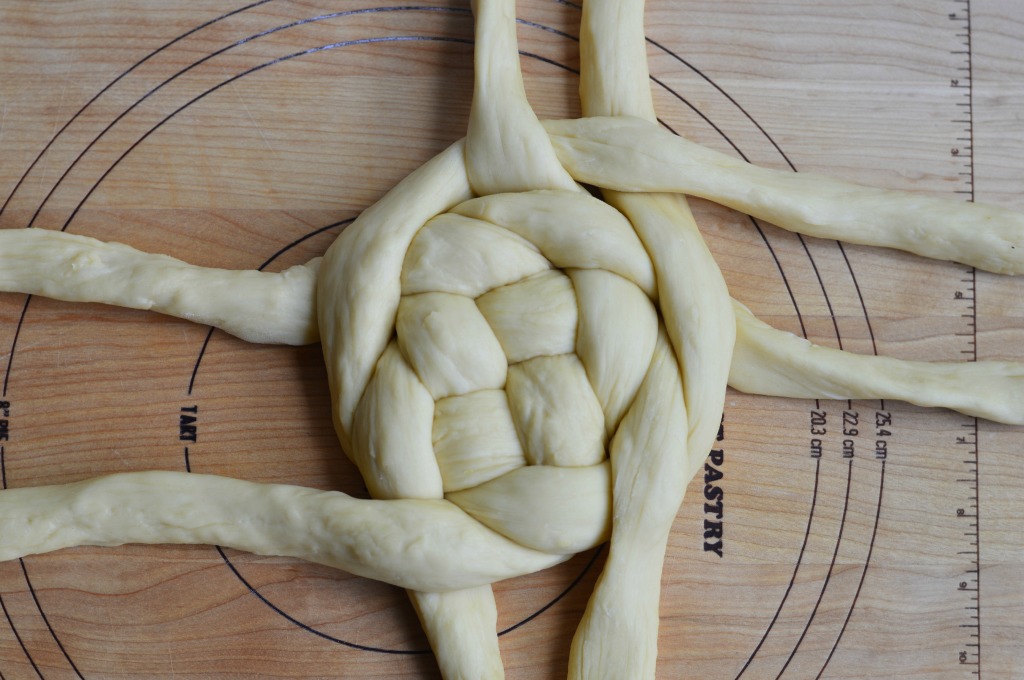
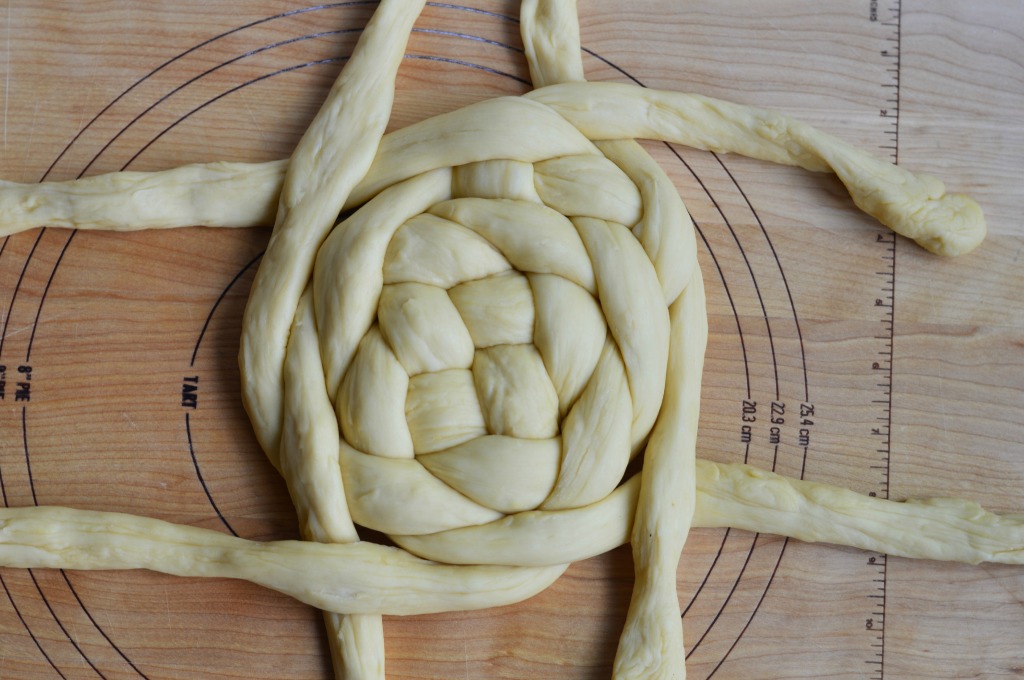
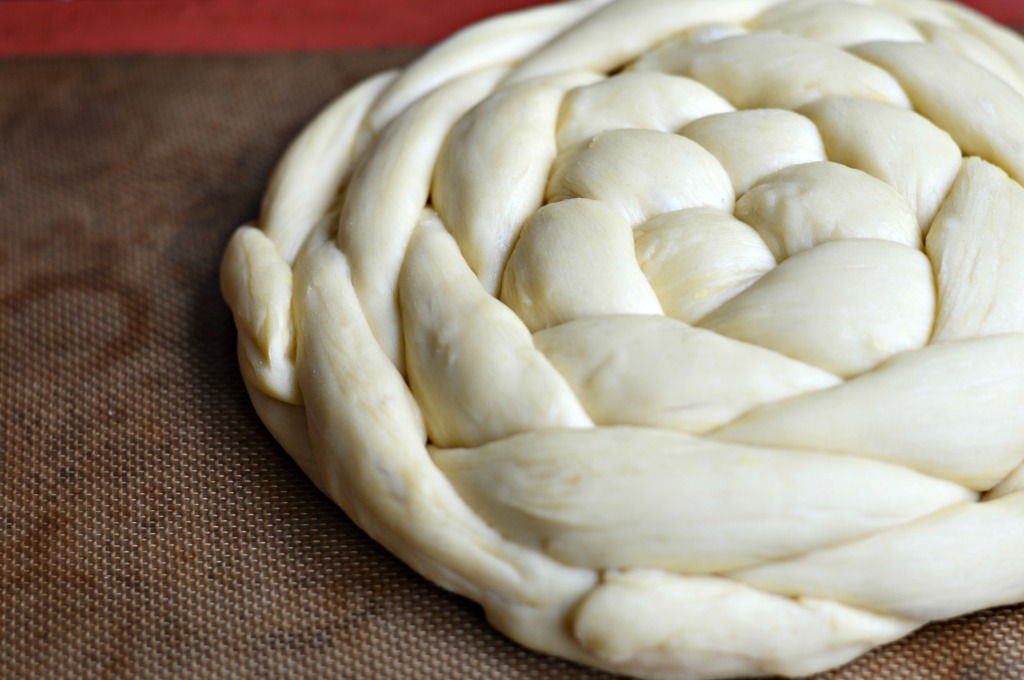
To make a round challah, you can simply roll the dough into a long strand and then twist it up in a spiral. If you want to get fancy, you can make a round, braided challah using the method that I explain in the recipe and demonstrate in the pictures.
Whether or not you are Jewish and plan to celebrate Rosh Hashanah, you should try making challah at home. It is a forgiving project and one that you can do with your kids. Many Jewish families that I know make challah together on Fridays for Shabbat dinner and even my kids’ preschool used to turn out a decent loaf. Plus, the results are so much better than the commercial challahs. Never pay $8 for a loaf of inferior challah again!
Because of the richness of the dough, challah will keep for several days on your kitchen counter without going stale. I doubt it will last that long however.
- 4 cups bread flour (20 oz)
- 2¼ tsp. active dry yeast
- ¼ cup sugar
- 3 eggs at room temperature
- 1 cup warm water (110-120 degrees)
- ¼ cup vegetable oil
- 1 tsp salt
- In the bowl of a standing mixer fitted with a dough hook, combine the flour, yeast and warm water. Stir to combine.
- Add the sugar, 2 of the eggs, vegetable oil and salt.
- Mix the dough with the dough hook until a smooth dough emerges, about five minutes.
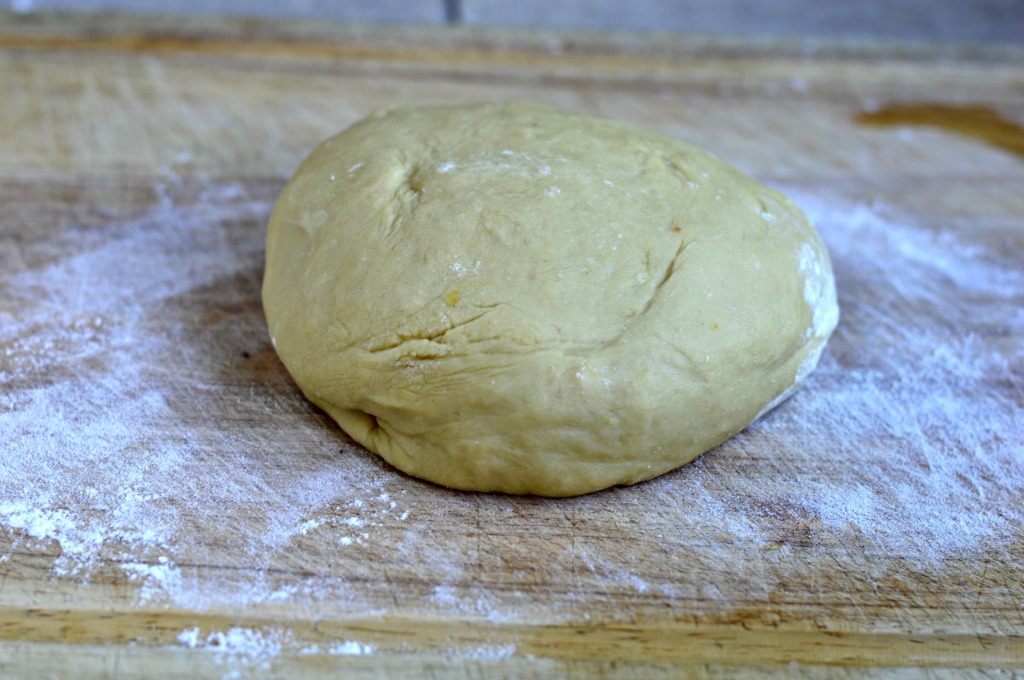
- Turn the dough out onto a well-floured board and knead by hand for an additional five minutes. The dough should be smooth, elastic and not sticky.
- Place the dough in a bowl that has been oiled on all sides. Cover the dough with a clean cloth and allow it to rise in a warm place for two hours or until doubled in size.
- Punch down risen dough and, if braiding, divide into four equal parts. (I like to use my kitchen scale to ensure my pieces are of equal size.)
- If forming a spiral, roll dough into a long, thin strand and shape into a spiral.
- For braid, roll each piece into a long, thin strand 26-28 inches long.
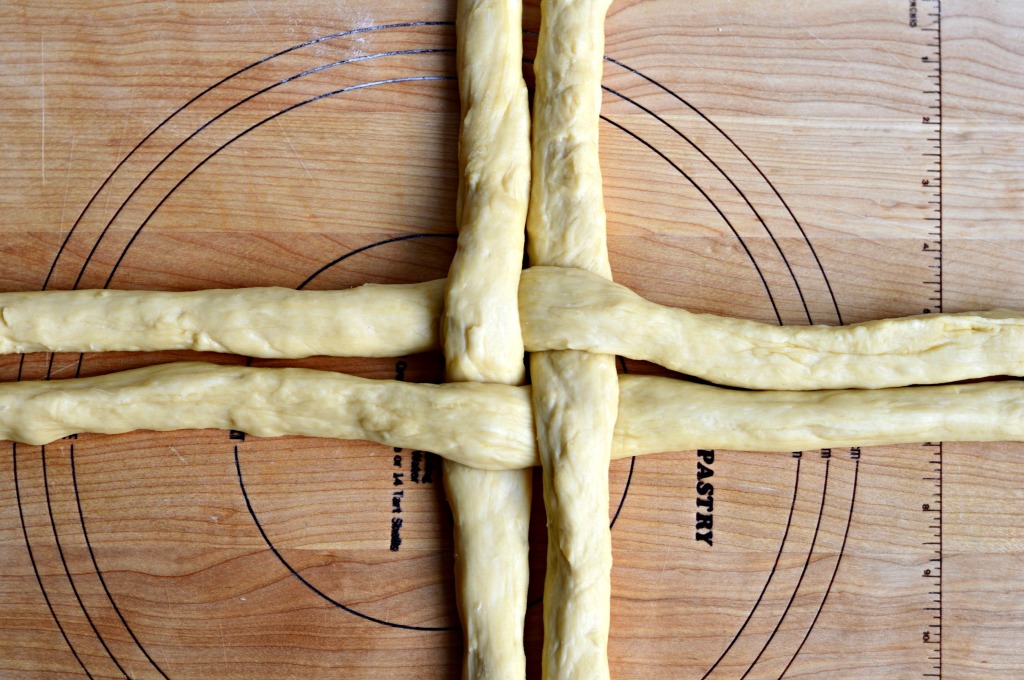
- To braid the challah, place two of the strands next to each vertically on a board. Weave the remaining two strands horizontally over and under the vertical strands. The result should look like a plus sign with no spaces between the strands. There should be two strands pointing in each direction.
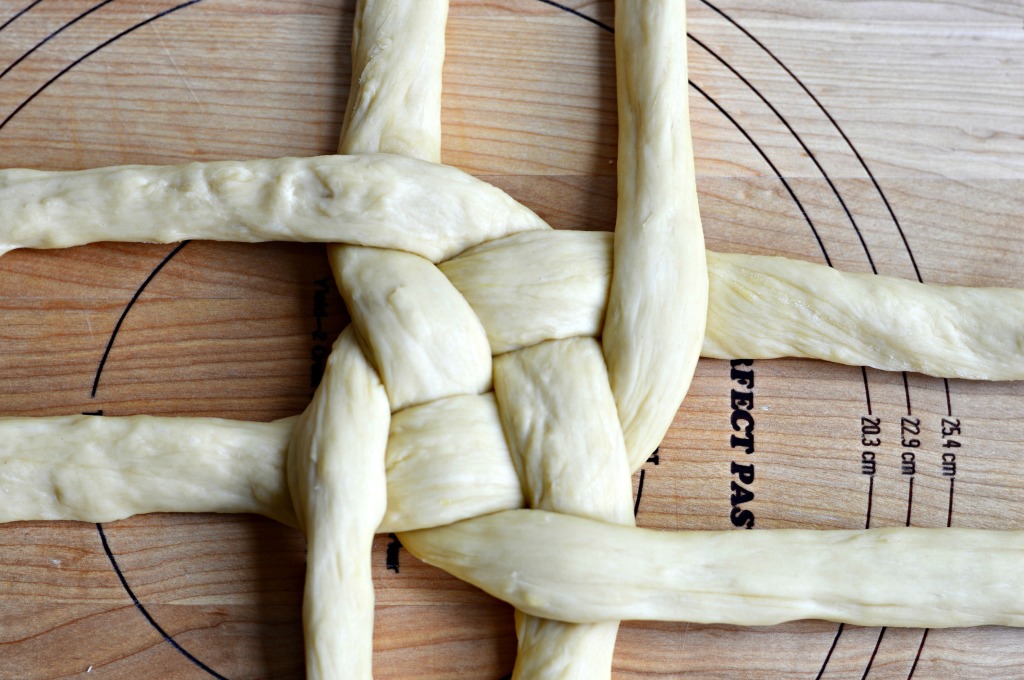
- For each direction, take the strand on the left and cross it over the strand on the right leaving no space between the strands.
- Next, do the same action going the opposite direction.
- Repeat crossing the strands over each other, alternating directions until you run out of dough. Take the ends and pinch them closed and tuck the under the loaf.
- Carefully transfer the braided loaf to a baking sheet lined with parchment paper or a Silpat baking mat.
- Cover the loaf and allow to rise an additional 30 minutes to one hour.
- Preheat the oven to 350.
- Before placing the loaf in the oven, beat the remaining egg in a small bowl. Brush the egg wash on the challah, making sure to get in the crevices of the braids.
- Bake 35 minutes until golden brown.
- Allow to cool on a wire rack prior to cutting.





Emily, thanks for the braiding tips! Mine did not look that pretty last RH. Do you find that bread flour makes a big difference? I’ve been using AP and I just bought BF to try with tomorrow’s challah, so this is a timely post.
Yes, I think bread flour will give your challah better structure. Be sure to report back!
Glad to see that you truly have conquered yeast! Your loaf is beautiful. Keep up the good work.
Thanks Nancy! Interestingly, when I first went to make the challah, I proofed the yeast from the jar in my fridge and it did not bloom. So I decided that that yeast was too old and went out and bought new yeast and it worked perfectly. Good lesson for me.
This is beautiful. Thank you.